4th of July

I have been here in Korea for just over two weeks and am settling in at Camp Red Cloud, located north of Seoul. I think I’ve done a poor job in the blog of laying out the last month and half in which there has obviously been some significant changes in what I am doing.

On May 20th, I graduated from the School of Advanced Military Studies, culminating my two years at Fort Leavenworth, Kansas, knee deep in graduate-level text books and Army field manuals. One of the requirements for graduation was to write a monograph on a military subject. I choose to write on the early history of MARS prior to World War II, when it was known as the Army Amateur Radio System (AARS). During this years Hamvention at Dayton, I had the opportunity to present the paper and I am pretty happy on how it all came together. No significant research had ever been done on early MARS history so I spent the majority of my research combing through primary sources and even conducting a few interviews with the few remaining former members of the AARS. If you have an interest in MARS, the history of radio in the Army, or the origins and organization of radio emergency communications, the paper is available here at no cost. One facet to the history of the AARS that I found intriguing was the relationship that grew between the AARS and the Civilian Conservation Corps during the Great Depression. The ARRL recently posted a short article I wrote on the subject and you can see it here if you are interested.

My assignment following school was to Korea with the 2nd Infantry Division. To actually get there, I elected to take a less typical means of transportation for part of the journey. I decided to take Amtrak from Kansas City to Seattle, where I would board a government contract flight to Seoul. I had ridden trains quite a bit in Europe, but never had taken a train for more than a short distance in the United States. I had also recently read Waiting on a Train: The Embattled Future of Passenger Rail Service, A Year Spent Riding Across America by James McCommons. If you are interested in passenger rail travel, enjoy a good road trip, or would like to know why train travel fell victim to the car culture, you will enjoy this book. The author, James McCommons, travels all the primary Amtrak routes (with mixed experiences) and talks with US rail movers and shakers around the country. Overall, he said Amtrak was good and getting better. I decided to see for myself.

One of the countries more historic and picturesque routes is that travelled by the California Zephyr. Originating in Chicago, the train traces its way west, climbing through the Rockies west of Denver and on to the Sierra Nevada’s an into California, terminating near San Francisco. My folks still live where I grew up near San Jose, so California was great for a stop over. I could then take Amtrak’s Coast Starlight from San Jose through Northern California, central Oregon through Eugene and Portland, then on to Seattle.

The train ride west was wonderful and I did write a post about it. The stop over in California was a lot of fun. Arriving during the early evening of Thursday, June 10th, I was able to get some sleep and meet my dad for some QRP portable field operations. We headed up to the Santa Cruz Mountains, above Saratoga, strung up a 40m dipole and had fun playing with my FT-817 and KX1. Although we didn’t achieve any great DX contacts, it was a great time. Saturday morning we headed over to a local monthly hamfest known as the Electronics Flea Market @ De Anza College. De Anza College is a little known junior college which has overseen the growth of Silicon Valley. Although I did not find anything I couldn’t live without, I enjoyed roaming around and seeing what the vendors had.

Before lunch, we headed over to the Computer History Museum in Mountain View. Founded in 1999, the museum opened long after I had left the Bay Area. Very cool museum!

Then it was back to the train station in San Jose and I hopped on the Coast Starlight and headed north. The train ride was relaxing with some amazing scenery.

I spent Sunday night in Seattle and caught a shuttle bus on Monday to SEATAC. Flying with AMC can be an experience and differs from a commercial flight. The AMC counter was located at the far end of the international terminal and I joined a long line of guys with short haircuts and heavy, canvas green bags. Although I had to check in at 7:00pm, the flight wasn’t scheduled to board until 1am. They didn’t pack the flight, so there was a little elbow room. Instead of flying directly to Korea, our route would take us to Anchorage, followed by Yakota (near Tokyo) and then Osan Airbase in Korea. We got to Anchorage, deplaned for fueling, reboarded and then sat for three hours. Apparently the weather was bad over Japan, so we were held over for about 24 hours in Anchorage. I had been stationed in Alaska during 1993-1994 and it was nice to see that midnight sun again (sunset at 11:30pm with sunrise at 4:30am).

From Anchorage to Japan with a short layover and then on to Korea. The rest of the story is here.

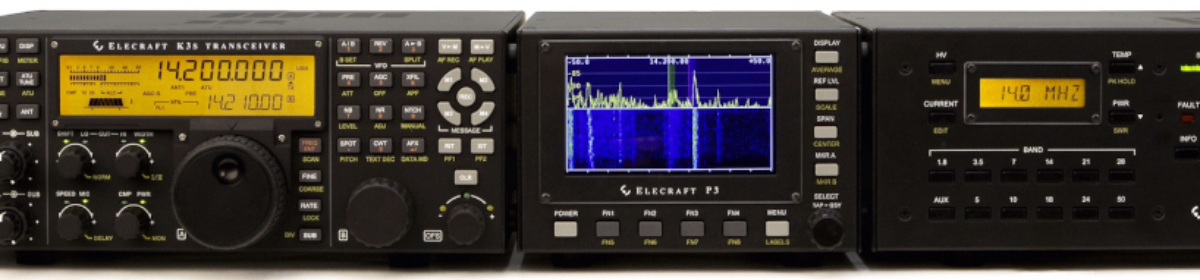
And on the amateur radio side of things… My equipment is here. I shipped over my Icom IC-7000 for HF and a Kenwood TM-D710A to use with my EchoIRLP node. Also on the way is a Davis Vantage Vue weather station that I hope to get on line and on APRS. I need to get my Korean license and have all the necessary paperwork. Just need to get it turned in now. There is a monthly hamfest in Seoul next Sunday that I am going to try an attend – that should be an experience and I will have to bring my camera.

Have you been enjoying Jeff’s new podcast at KE9V.net? Cornbread Road is a Jeff at his best, weaving a tale of mystery and amateur radio in the heartland.

I will endeavor to keep my blog up to date with posts about my experiences here in Korea.

Let it snow!

It is snowing now – NWS says we’ll get 2 inches. I am hoping for more. I’ll have to do a bit of shoveling to clear the driveway in the morning, then I’ll head out with the 4 year old for some sledding. Should be a good time, although with the low temps (the high today was 10F) we will have to bundle up a bit. It has been so cold since New Year’s Eve that the wind direction sensor on my Davis Vantage Pro2 has frozen, pointing north.

I’ve been doing a little configuration work in the shack. I decided to dedicate one of my computers to running my weather station/APRS combo. Before I had the software (Weather Display and UI-View32) running on the same computer I used for my HF work. Things got busy with the log and Ham Radio Deluxe going plus the APRS and weather applications. Moving the weather and APRS applications onto its own computer should give me a bit more stability. I installed a dual boot configuration of Win XP and Ubuntu 9.10. I am initially sticking with Win XP as I know it works well with both Weather Display and UI-View32. My plan is then to migrate to Ubuntu 9.10 and run Xastir and the Linux version of Weather Display. I need to do some googeling and see who else is doing that and see what issues they ran into. I did find and interesting linux application called wview – will definitely explore that. Looks like it is also a replacement for Weather Display Live.

I have a new computer than I am going to dedicate to just HF operations – one of Dell’s new Zino computers. I like the small form factor and I will also install a dual boot configuration to have some fun with both Win XP and Ubuntu.

The old (circa 2005) desktop computer that used to run both the HF ham applications, Weather Display, and UI-View32 has now been moved to another table in the basement and has become the arcade machine. My cool xmas gift was the X-Arcade Tankstick – an amazing arcade controller that is built like an old school arcade console. Along with MAME software I have been able to play some wonderful, classic arcade games: Pac-Man, Galaga, Berzerk!, Robotron, Battlezone, and my favorite – Scramble. The Tankstick also has a trackball, so I have been able to relive the glory of both Missile Command and Centepede as well. I’ve had the four year old behind the joystick playing Frogger – and she did pretty darn good. It is hard to beat the classic arcade games.

The plan for my HF station, based around my Icom IC-7000 is to mount it in two iPortable boxes. The set up will include the IC-7000, a tuner, power supply, and the Dell Zino. If (…when…) I am deployed again, I will be able to have these two iPortable boxes sent out to me. I’ll take some pics as I put the iPortable station together and post it here.

Weather Display problems

I have been using my Davis Vantage Pro2 weather station along with the Weather Display software since the start of January without serious issue. I also have not been on my HF rig much. I’ve noticed over the past few weekends when I did key up the mike for a short QSO that the Weather Display software had locked up. The computer is still functioning, to include UI-View32 but Weather Display freezes. After a little testing, it looks like this only occurs when I transmit on 20M at some point above 50-75 watts out. I played around with a few ferrite chokes on cables between the computer and my IC-7000, but it did not fix the problem.

I need to fix this problem. I can’t have my weather data locking up every time I want to get on HF.

This week I am going to tear apart the station and try to isolate the problem. I am also using the opportunity to put sliders on the legs of the table which will allow me better allow me to pull the table away from the wall when I need to get behind the gear.

Station goals


I set a few goals back in July and thought I would take a look at my progress:

What I want to accomplish in the Kansas Shack:
– HF phone and CW operation; 80m-10m
– HF digital modes (PSK-31, RTTY, PACTOR III)
– Computer logging
– 2m FM base station
– APRS weather station, interfaced with a dedicated 2m transceiver
– Online weather page, showing current weather conditions
– Separate, organized workbench

HF phone and CW operation; 80m-10m – my HF activities are centered around my IC-7000. I would like to get the TS-930S up an operational, but I am afraid that is not in the budget at this point.

HF digital modes (PSK-31, RTTY, PACTOR III) – I am using my RIGblaster Plug & Play for digital modes… other than PACTOR III. I have not yet hooked up my SCS PTC-IIusb Modem.

Computer logging – I do have Ham Radio Deluxe loaded now, but I want to find a good linux version.

2m FM base station – currently the FT-2800M for the job. I do have some plans to move my IC-208H from the truck into the shack. That will give me a 70cm capability in addition to the 2M. The truck is getting a new rig… more on that soon.

APRS weather station, interfaced with a dedicated 2m transceiver – I am using a FT-1500 for the job, connected to UI-View32 and receiving data from the Davis VantagePro2. The problem here is that I only have the one antenna up so this limits my ability to hop on the local repeaters from the shack. I need to either get a coax switch to be able to switch between the two rigs or put another antenna up.

Online weather page, showing current weather conditions – yes indeed… I think this is working pretty nice.

Separate, organized workbench – also a success… although it seems to be too crowded with stuff. The best part is the pegboard for tools – I no longer have the problem of quickly locating the tools I need.

Overall, I am happy with the progress I have made getting the shack in shape. What I want to work on now:
– New antenna for HF
– Fix up the ARSIB
– Get the SB-200 amp working
– Transition all shack computers to Ubuntu linux

Working in the shack


I spent some time this afternoon trying to get the shack a little better organized. I mounted two power strips on the wall behind my desk to help organize my power cables. I also mounted the console for my Davis Vantage Pro2 weather station directly above my computer monitors for easy visibility. I use Anderson Powerpoll connectors and West Mountain Rigrunners for my power distribution. Things were looking a bit like a rat’s nest, so I shut everything down, unplug all the connectors, rerouted them in a more coherent fashion, and replugged everything in. I also added in my West Mountain PwrGate and hooked in my 12v deep cycle marine battery. The PwrGate keeps the marine battery charged and automatically switches to it should there be a drop in the 120v house power. I still need an UPS for my computer running the Weather Display software and UI-View32.

Also added a lamp to the desk to help me see what the heck I’m doing.

Finally, I fired up the IC-7000 just to make sure it was still working and had a nice QSO with VE6CQ operating from Calgary, Canada.

Another day in the shade

I hooked up my Morse key to my Icom IC-7000 and it appears to be working fine. Also hooked up an external speaker which is working nicely. I tried to connect my SM-20 microphone but realize now that a need a connector that I don’t have. I don’t want to hook up my Heil headset with the boom mike just yet. I was able to have a QSO with an Italian station and again with TI8II (Costa Rica), except on 20M this time.

More stuff I’m going to get done tomorrow:
– gather up my old (digital) logs
– back up my current Kansas log
– load up my YI9MI logs and prepare and organize the remaining received QSL cards
– order the adapter for the SM-20 mic
– find my weather station software
– have a CW QSO

I’m prepping to start a batch of homebrew beer. Tomorrow I’m going to start the process. Maybe have some fresh beer by Halloween?

Back in the saddle

I -finally- got my HF rig working here at the Kansas QTH.

Since arriving here back in July, I’ve been super busy. School (the Army’s Command & General Staff College (CGSC)) kicked in at the beginning of August. The last formal schooling I had was eight years ago – so I was a bit rusty at getting into the swing of things (i.e. reading, reading… and more reading). I’m also taking a complementarity master’s degree program in International Relations through Webster University (two nights a week). The good news is I was able to talk the XYL into taking the master’s courses with me. The bad news is that sometimes the master’s stuff chews up more time than my school work for CGSC.

CGSC can be intense. September was packed with wall-to-wall learning, usually from 0830 to at least 1530. The schedule is starting to lighten up a bit.

Today I was able catch my breath a bit… out of class at 1130. The sun was shining, a beautiful day. I had some antenna maintenance to do. A little bit of time on the roof and the majority of my HF problems were fixed. I’m now up on HF, except for 80M. I think a little work on my counterpoise will fix that.

Back in the basement (aka The Scud Bunker) I hooked up my Icom IC-7000 to the new and improved HF antenna – bingo… all the problems I was experiencing in the past were gone. A QSO with KC2PBX, Pierre on Long Island, NY on 20M and then TI8II from Costa Rica on 17M, later with Ray, W1RAA from Tampa, FL. It felt good having some HF QSOs. I did a little more work with my station setup; hooking up the RIGtalk and RIGblaster Plug&Play. There’s more work to do and I should have time later in the week.

Other news:
– I’m switching from Windows to Ubuntu Linux. I WILL NOT UPGRADE FROM XP TO VISTA. Vista is a tool of the devil and I will have no part of it. My Toshiba laptop has been dual boot between XP and Ubuntu for a while, but had rarely been using the Ubuntu. I ordered a Dell Mini 9 (very tiny netbook) to help with school (writing papers in the library rather than goofing off in the Scud Bunker). The Dell Mini is coming with Ubuntu pre-loaded. Sweet. The next step will be setting up one of my towers as an Ubuntu server. Goodbye Microsoft.
– I’ve gone Kindle. Both the XYL and myself have the Amazon Kindle. I like it a lot better than my Sony eBook. Getting the Washington Post first thing every morning is great. The battery life is a little to be desired. The best part is that I can read KE9V’s blog right on my Kindle.

Ok – back to the books. I will get better at making frequent updates here.

Electric Radio – Celebrating a Bygone Era


I recently put in an order to AES for a few items I really didn’t need. Fortunately AES ships to APO addresses… while HRO does not. When stateside I prefer to order from HRO, having had great overall past experience with them. Quick delivery, no fuss, no muss. If I have a problem, I can call the store directly. I’ve also used HRO to give gifts (Father’s Day, Christmas, Birthday) to my dad, KD6EUG, and that has worked very smoothly. When I’m back visiting the folks in Sunnyvale, CA – I always try to stop by the HRO store there. It is near Fry’s Electronics – not far from Moffett Field. HRO also helped field the US Army Amateur Radio Society and the Baghdad Amateur Radio Society a complete radio setup, to include IC-7000, power supply, CW key, etc. HRO’s good people. However… they don’t ship to APO addresses, so I ordered from AES. Now AES will allow you to use a stateside billing address, but will send your order to the APO address. But here is the kicker – AES sends an invoice to your billing address… so the XYL gets it and finds out you have been ordering a bunch of stuff you don’t really need instead of saving money for our upcoming trip to Europe. But I digress. One of the items I ordered was the August 2007 issue of the periodical Electric Radio. What a wonderful little magazine! I’ve talked about other radio magazines in the past and lately I’ve taken a real shine to World Radio.

Electric Radio is a real jewel. Inside the front cover, the magazine states it’s intent upfront: Electric Radio is all about restoration, maintenance, and continued use of vintage radio equipment. So what does this have to do with me? I don’t restore or use vintage equipment. I wouldn’t know the difference between Collins, Drake, National, or anything other type of old, dusty metal cabineted stuff. Despite this, the magazine is still a joy to read. Page 2 talks about Electric Radio’s “Honor Your Elmer Contest” – how great of an idea is that?! Page 39 has an amazing article about the life of George Mouridian, W1GAC, SK. The magazine itself is the size of a church pamphlet with a nice sturdy color cover. The pictures inside are black and white – but what better captures the essence of classic radio than black and white photos. The gear is wonderful to see… massive tubes, huge dials, looks like some of the rigs could have easily of come from Dr. Frankenstein’s laboratory. I probably won’t subscribe and you may not either – but I do recommend you pick up at least one copy to have a look for yourself.

AEN5AC

During my deployment to Iraq, I wanted to setup and operate a MARS station. I know that MARS is not nearly as well used by deployed soldiers as it once was to send MARSGrams and use phone patches to talk to family back home. Access to the internet and AT&T Call Centers now enable most soldiers to stay in touch. However, it is always good planning to have a back up for communications – and a MARS station provides that. I have been through initial MARS training back in Virginia, completing the basic course and participating in local nets. It was good to get that training because it provided me a better understanding of how MARS functions and well as educating me on basic net procedures. MARS nets are generally not procedurally similar to how military voice radio communications function today. It was good to be familiar with the differences.

Applying for a MARS callsign to operate in Iraq is straight forward. I contacted Mr. Daniel Wolff, AEM1WF, in Germany. Mr. Wolff processed my application and assigned me my MARS callsign as well as provided me with the regional net plans and basic MARS information for operating in the region.

For a station setup, I am using an ICOM IC-7000. The rig is a reasonably priced, full-featured radio with a modest size that lends itself to portable operations.

The primary means of moving MARS traffic in the region is digital, specifically Pactor using the WL2K/Airmail PMBO (Participating Mail Box Office) backbone. To add a Pactor capability to my station I initially chose the Kantronics KAM XL. Although this TNC is only capable of Pactor 1, it can do the job.

I wanted flexibility for the power system. We our currently on the Iraqi power grid which is 240V. At some point my team may relocate to a US-controlled area where the power source could possibly be 120V. I needed a power supply that was capable of using both a 120V or 240V electrical source – the Astron SS-30M suited this requirement nicely. For power distribution, I am using a RIGrunner which uses the Anderson Powerpole connectors. I’ve had past success using Anderson Powerpoles; they provide flexibility of operation and a dependable connection. The power grid here is up and down – I needed a battery backup to provide sustainable power during the brief outages. The solution was an 18Ah battery tied in through West Mountain Radio’s PWRgate. The PWRgate automatically transitions from the Astron SS-30M power supply to the backup battery should shore power fail and does so without a drop of supplied amps. I’ve been in the middle of a connection with the regional WL2K/PMBO when the power grid dropped and the PWRgate kept my the power coming without interruption.

I wanted a simple, efficient antenna that provided coverage from 80M to 10M with a modest footprint and that I could deploy with minimal assistance. A 130′ inverted vee was the solution. I am fortunate to be at a location where our one-story building has a high 20′ ceiling. There was also an unused 30′ OE-254 mast already emplaced on top of the roof that I could use to support the center point of the vee. Some more scrounging around the camp rewarded me with additional support polls that I used to get both ends of the vee 35′ off the ground. The building and surrounding structures allowed me to orient the antenna NE/SW, leaving the sides to face NW towards AEM1US in Germany and SE to AEN5QT in Qatar – the two nearest PMBOs. I used ladderline from the center point down to a 4:1 balun and into the LDG AT-200pro antenna tuner.

Installing Airmail (version 3.3.081) on my PC was straight forward with good directions provided by “Airmail for WL2K MARS_Basic Training. PDF” and additional help from the Yahoo Group. The KAM XL TNC (version 1.07050) is supported by Airmail and configures all the Airmail software settings for you. I did a hard reset on KAM XL then configured the KAM XL’s XMITLVL setting via Airmail’s Tools>Dumb Terminal. I used the CAL command and then the T command (send square wave) to create a signal into the IC-7000. I incrementally increased the XMITLVL value until I peaked the IC-7000’s ALC meter into the red. I then backed the XMITLVL setting down one. I make slight adjustments of the XMITLVL depending on the band I am operating on.

With Airmail, connecting to a PMBO is relatively easy. Bringing up the HF Module and selecting Mode>Monitoring Enabled allows you to see all communications between the PC and the modem.

Once you select Mode>Monitoring Enabled you’ll see:
cmd= MON ON/OFF
reply=MONITOR was OFF/OFF

Close the HF Module window and then go back to Airmail and select the HF Module again.

This time when the HF Module is stared, Airmail connects to the KAM XL and makes the following setting adjustments (which you can see because “Monitoring Enabled” is ON):

2007/MM/DD HH:MM:SS KAM-XL modem initialized OK
cmd= XFLOW OFF
reply=XFLOW was OFF
cmd= ECHO ON
reply=ECHO was ON
cmd= XMITECHO ON
reply=XMITECHO was ON
cmd= TXFLOW OFF
reply=TXFLOW was OFF
cmd= XFLOW OFF
reply=XFLOW was OFF
cmd= TRFLOW OFF
reply=TRFLOW was OFF
cmd= AUTOCR 0
reply=AUTOCR was 0
cmd= AUTOLF OFF
reply=AUTOLF was OFF
cmd= CRADD OFF
reply=CRADD was OFF
cmd= MAXUSERS 10/10
reply=MAXUSERS was 10/10
cmd= CRSUP OFF/OFF
reply=CRSUP was OFF/OFF
cmd= LFADD OFF/OFF
reply=LFADD was OFF/OFF
cmd= LFSUP OFF/OFF
reply=LFSUP was OFF/OFF
cmd= ARQID 0
reply=ARQID was 0
cmd= ARQBBS OFF
reply=ARQBBS was OFF
cmd= PTHUFF ON
reply=PTHUFF was ON
cmd= SHIFT MODEM
reply=SHIFT was MODEM
cmd= SPACE 3000
reply=SPACE was 1600
cmd= MARK 1400
reply=MARK was 1400
cmd= SPACE 1600
reply=SPACE was 3000
cmd= INV ON
reply=INVERT was OFF
cmd= MYPT AEN5AC
reply=ok
cmd= MON OFF/OFF
reply=MONITOR was OFF/OFF
cmd= PACTOR
reply=ok
cmd= MYPT AEN5AC
reply=ok

Next, select the callsign of the PMBO you are trying to reach. Combined with the integrated ITS HF Propagation software, it is easy to select the best frequency to attempt a connection. Airmail has the ability to control your rig directly and adjust the proper frequency and mode prior to transmitting. Adjustments can also be made manually by using the dial frequency/mode being displayed in the lower right corner of the HF Module window.

When trying to connect, Airmail will make several 1 to 2 second transmissions attempting to raise the distant PMBO. I adjusted the IC-7000s MONITOR function to allow me to hear and confirm that the data is being transmitted. The following is displayed in Airmail’s HF Module window when you initiate a connection:

2007/MM/DD HH:MM:SS Calling (PMBO’s callsign)

cmd=PACTOR (PMBO’s callsign)
reply=ok

Upon connecting, something like the following appears in the HF Module window:

2007/MM/DD HH:MM:SS Connected to (PMBO’s callsign)
(LINKED TO (PMBO’s callsign))
1AEN5AC (This is your callsign)
(Pactor1: )
[WL2K-2.1.8-B2FHIMT$]
Welcome to…. (info concerning this PMBO you connected to)

The Following are a list of frequencies that this PMBO scans.
Please note that not all these frequencies can be used from all locations.
Please consult your Netplan for proper usage in your area.

(PMBO’s callsign) last contacted the Central server 1 min ago.

AEN5AC de (PMBO’s callsign) QTC 0 Msgs 0 bytes>
[AirMail-3.3.081-B2FHIM$]
; (PMBO’s callsign) de AEN5AC
FF
(PACTOR STANDBY)
2007/MM/DD HH:MM:SS Disconnected from (PMBO’s callsign)

Airmail uploads outgoing mail before it downloads incoming mail – the process is automatic.

Despite heavy QRM and QRN, Pactor is able to get through with just a 100 watts. Pactor 1 has a slow data rate, but can get simple text emails through quickly. I have recently upgraded the TNC to an SCS PTC-IIusb Modem with Pactor 3 capability. The PTC-IIusb provides a more stable connection and better data rate transfer.

Future plans for the station include mounting everything in a road case for easy portability.

Toyota Tundra Mobile Installation

http://www.eham.net/articles/17265

Steve Clifford (K4GUN) on August 8, 2007

I recently purchased a new truck and installed two radios. The install went so well that I thought I’d post an article with details on what was used and how it went.

First of all, the truck itself really helped make this possible. It’s a 2007 Toyota Tundra 4×4 with the 5.7 liter V8. I chose the Double Cab model over the Crew Max for a couple of reasons. First, the bed is 6.5′ long instead of 5.5′ on the Crew Max. The Double Cab also has better storage under the backseat, as we will see shortly. The truck also has two small holes in the back of the cab that are covered with rubber plugs. The holes are not large enough to fit a 259 connector through and require unbolting the rear seatbelt and pulling off a plastic cover.

My first project was to install an auxiliary battery. For this, I chose an Optima Yellow Top size 31. I put it in a cheap battery box to which I installed a Rig Runner 5 outlet panel. To charge this, I needed a battery charging system. I did a number of searches and found one that is sold through an eBay store. http://cgi.ebay.com/ws/eBayISAPI.dll?ViewItem&item=120146674911This is the one of only two parts that I didn’t install myself. I work at a car dealership and had one of my technicians install it. He had no problems and the instructions are very clear and simple. The kit includes everything you need to hook up the spare battery. The unit isolates the main truck battery for the first 5 minutes after start up before it allows current to charge the auxiliary battery.

The battery itself is mounted in a toolbox in the bed. I decided to get a steel box instead of the normal aluminum because of the weight. Steel boxes will rust quickly if scratched so I applied a coat of spray-on bedliner.

Battery in the tool box:

Battery isolator:

Next up are the radios themselves. I installed a Kenwood V708A and an Icom IC7000. Both fit in the center console of the Tundra. I’ve had people ask me about the heat from the Icom and so far, this hasn’t been a problem. I’ve been keeping an eye on the temperature indicator and it hasn’t gotten too high. If this becomes a problem, I’ll put another hole in the bottom of the console and install a fan.

The Icom head unit is mounted on the center console with a Portagrip model 717. For details, see page 38 of the current HRO catalogue. The Tundra has an auxiliary plug for audio and I ran a short cord from the head unit into this plug. The factory speakers make for very clear HF audio. The only down side to this is that I also have Bluetooth which interrupts the radio whenever a call comes in.

The Kenwood head unit is mounted in the overhead console. It’s also a Portagrip but the model 726, which is a much shorter arm. The wires are run through the overhead console and around the windshield. The Kenwood supplied cord was not long enough to make it all the way to the base unit. It turns out that this cord is nothing more than a modular phone line with a special plug on the head unit end and a regular phone connection on the base unit end. I used a regular phone line coupler and extension line to get to the head unit. Because regular phone line is not shielded as well as the Kenwood cord, I used a DX Engineering Ferrite bead. I don’t know if I needed that, but I have no RF issues so I’ll leave it. Because the Kenwood requires the microphone to be connected to the head unit, I had to drill a hole in the console to get the cord out.

Here is the Kenwood in the overhead. Since taking this picture, I have routed the wire inside the console. It doesn’t hang out now as is shown in the picture.

Here is the console with both radios, a storage bin and my other truck accessory

Here is another shot with the storage bin removed. The bin does not crush the wires. I drilled the hole to get the wires out.

The wires are routed to the back of the cab. The Tundra comes available with a storage bin under the back seat. I ran the wires under this and then routed them to the panels with the hole to the outside.

Next is the antenna system. For HF, I went with a Tarheel Stubby 75 with a fold-over for the 5′ whip. I originally had it set up with a Tarheel cap hat, but removed it when I discovered that I couldn’t tune 40 meters with it on. Strangely, I could tune 75 and 20, but not 40. I did not get any type of auto tuner for the antenna and instead just used the rocker switch from Tarheel. It works well and is easy to tune. I may eventually get a Turbo Tuner but am not in a rush for that.

I don’t plan on using the UHF or VHF very often on the Icom but I did want an antenna connected so I put a magnet mounted Diamond NR770 on the tool box. Because the connector would not fit through the hole in the truck, I had to cut it off and reattach it once it was routed into the cab.

The other antenna is a Diamond SG7900, which feeds the Kenwood. It’s a big antenna but actually looks small next to the Tarheel. It also has a fold-over for parking garages.

Last, let’s talk about the antenna mounts. At first, I thought I could get away with one of the rubber friction stake pocket mounts. I attempted to install one and quickly discovered that the stake pocket was just too big. I then contacted Geotool. Geotool makes several mounts and they are specific to different trucks stake pockets. The new generation Tundra takes the same mounts as the Ford so if you order from him, don’t get the older Toyota mount.

The Geotool mount is very solid. The coax is routed through the body of the bed and is soldered directly to the mount. It bolts to the bottom of the stake pocket and if you scrape off the paint, you probably don’t need additional grounding. I scraped paint but also installed grounding straps. Here is a link to Geotool: http://www.geotool.com/antmount.htm Be sure and tell him if you need this for HF or VHF use. The bases are different and I have one of each.

While I’m very happy with the installation, which is very clean and tidy, the real proof has been the performance. I’m still quite new to the hobby so I often don’t really know what to expect. I have a station in my house and have some power line noises that I’m trying to work out. I was stunned at how much I could hear on the mobile unit. Not only could I hear, I could be heard. I immediately started trying to jump into some DX pile-ups and was happy to see that I could get through fairly easily. In the first week, I hit Argentina, Ukraine, Moldova, Cuba and several Central American stations. I got signal reports from 5-8 to 5-9 with a couple reporting 10 over 9. I even heard a Japanese station, but didn’t have time to try and make contact. All of this while driving 70 miles an hour down Interstate 95 in Virginia.

This radio is working so well that I often will turn off the home radio and go sit in my truck for an hour or so. It doesn’t do much for my gas mileage to be sitting there idling for so long, but the joy of the hobby is worth it.